

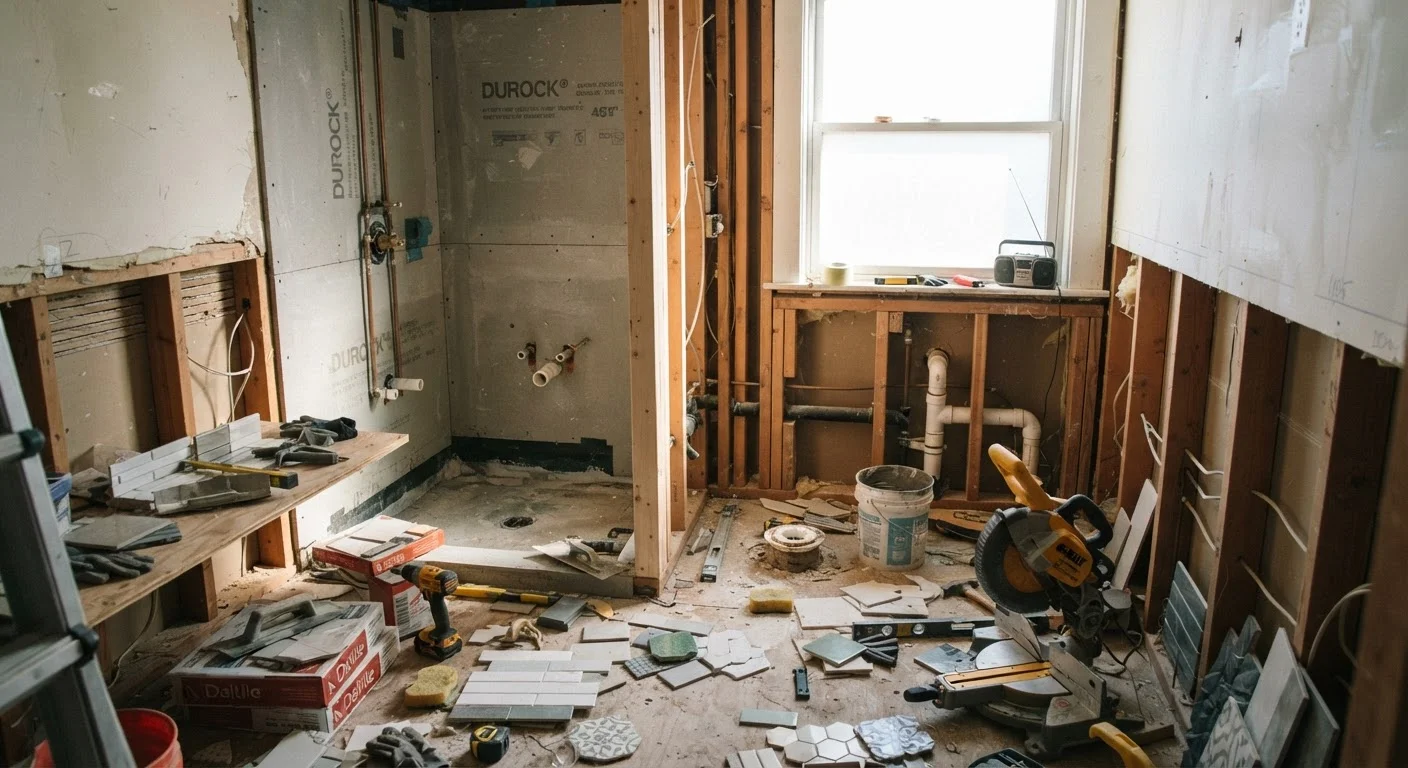
Why Bathroom Renovations Are Uniquely Complex
Bathrooms are among the most trade-intensive rooms in a house. In a space that is often less than 60 square feet, you are coordinating plumbing, electrical, ventilation, waterproofing, tile work, and finish carpentry - all of which depend on each other in a precise order. A misstep in any one phase can force you to undo work that came after it.
Unlike a living room refresh, a bathroom remodel almost always touches systems that are regulated and inspected. That means licensed professionals, permit applications, and scheduled inspections are standard parts of the process - not optional upgrades. If you are approaching your first significant project, reviewing this realistic starting guide for first-time renovators can help you set appropriate expectations before any work begins.
~$11,000-$28,000
Typical full bathroom remodel cost range
According to aggregated contractor and remodeling industry surveys, mid-range full bathroom remodels in the U.S. generally fall within this range, depending on scope and region.
15-20%
Recommended contingency budget percentage
Renovation professionals consistently recommend setting aside this portion of the total project budget to absorb hidden damage and scope adjustments.
1 in 3
Bathroom remodels uncovering hidden water damage
Industry estimates suggest a significant share of full bathroom gut renovations reveal some form of water-related damage behind walls or under flooring.
Planning Phase: Decisions to Make Before Demo Day
The planning phase is where most bathroom renovations are either set up for success or quietly undermined. Before a single tile is pulled or a wall opened, every material selection should be finalized - not just sketched out. Tile dimensions affect layout math. Vanity depth affects rough plumbing locations. A freestanding tub requires a different drain configuration than a drop-in model.
- Measure everything twice. Verify ceiling height, door swing clearance, and existing drain and supply locations.
- Establish a realistic budget with contingency. Most renovation professionals suggest reserving 15-20% of the total project cost for surprises. See why renovation budgets fall apart for a deeper look at where overruns typically originate.
- Decide on layout changes early. Moving the toilet or tub drain adds significant plumbing cost and almost always requires a permit. Keeping fixtures in their existing locations dramatically reduces complexity.
- Source all materials before demo. Back-ordered tile or a discontinued fixture can stall a project for weeks once walls are open.
Order all tile, fixtures, and specialty materials at least four to six weeks before your demo date. Confirm lead times personally with suppliers - not just the listing page estimate.
Supply delays are the single most common cause of mid-project standstills. Having materials on-site or confirmed for delivery before demo begins keeps trades on schedule and prevents costly downtime.
When adding blocking for grab bars or towel bars, photograph the stud bays with a tape measure visible before closing the walls. Save those photos with your home records.
Knowing exactly where blocking is located makes future installations straightforward and safe, without the risk of anchoring into empty drywall years later.
The Correct Sequence of Work
Sequencing is where DIY bathroom projects most often go wrong. The correct order of operations exists because each phase creates the substrate or the access point for the next. Here is the standard sequence for a full gut renovation:
- Demolition. Remove fixtures, tile, drywall, and flooring down to studs and subfloor. Protect the drain opening to prevent debris from entering the drain line.
- Rough plumbing. A licensed plumber relocates or extends supply lines and drain lines as needed. This work happens inside walls and floors before they are closed.
- Rough electrical. A licensed electrician runs new circuits, adds GFCI (ground fault circuit interrupter) protection - required near water sources - and positions outlet and switch boxes. Exhaust fan wiring is included here.
- Framing and blocking. Any new walls are framed; blocking (horizontal lumber added between studs) is installed where grab bars, towel bars, or heavy mirrors will be anchored. If you are planning accessibility features, aging-in-place renovations outlines exactly where blocking should go.
- Inspections. Rough plumbing and electrical inspections typically occur before walls are closed. Do not skip this step.
- Waterproofing and backer board. Cement board or a membrane-based waterproofing system is installed in wet areas - shower walls and floor - before any tile goes down.
- Tile work. Floor tile is typically set before wall tile so that wall tile can overlap the floor tile edge cleanly. Grout follows after the adhesive cures fully.
- Paint and drywall finishing. Non-wet areas receive drywall, tape, mud, and paint before trim and fixtures are installed.
- Finish plumbing and electrical. Toilets, vanities, faucets, shower valves, light fixtures, and exhaust fans are installed once surfaces are complete.
- Trim and accessories. Baseboards, door casing, mirrors, towel bars, and toilet paper holders are the final layer.
Common Pitfalls and How to Avoid Them
Even well-planned bathroom renovations encounter obstacles. Understanding the most common ones helps you respond without panic when they appear.
Hidden Water Damage
Once walls open, it is common to find rotted subfloor, deteriorated framing, or mold behind shower surrounds. This damage must be remediated fully before new materials go in - patching over compromised structure is not a safe shortcut. Budget time and money for this possibility from the start.
Never Cover Mold or Rot Without Full Remediation
If demolition reveals mold growth or rotted framing, tiling or drywalling over it will not resolve the underlying moisture problem - it will conceal it until the damage worsens. Mold remediation and structural repair must be completed and, in many jurisdictions, inspected before new materials are installed. Consult a licensed contractor or mold remediation specialist to assess the extent of the damage before proceeding.
Tile Layout Errors
Tile installed without a dry-laid plan can result in slivers of tile at prominent edges or misaligned grout joints. Always dry-lay the tile pattern from the center of the room outward before any adhesive is mixed.
Undersized Ventilation
Bathroom exhaust fans are rated in CFM. An undersized fan leaves humidity in the room, encouraging mold growth. The general rule is 1 CFM per square foot of floor space for rooms up to 100 square feet, though your electrician or contractor can advise on the right specification for your layout.
Scope Creep Mid-Project
It is tempting to expand the project once walls are open - adding a heated floor, relocating a window, or upgrading to a steam shower. Each addition resets timelines and costs. If you are curious about what expanding a renovation scope really involves, see what major additions look like before you break ground.
Permits, Inspections, and Working With Trades
Most municipalities require permits for bathroom work that involves plumbing changes, new electrical circuits, or structural modifications. Permits exist to ensure work meets minimum safety standards - not to create paperwork. Unpermitted work can surface during a home sale inspection and may need to be remediated at the seller's expense.
When working with licensed trades, get itemized written contracts that specify scope, materials, timeline, and payment schedule. Avoid contracts that request full payment upfront. A standard structure is a deposit at signing, progress payments tied to completed phases, and a final payment upon satisfactory inspection.
For kitchens, a similar permit-first discipline applies - the pre-renovation checklist for kitchens covers permit verification steps that translate directly to bathrooms as well.
If you are considering financing the project, home improvement financing options provides a plain-language overview of how loans, HELOCs, and contractor payment plans typically work.
Finishing Touches and Final Inspection
The final phase feels fast compared to the rough work, but it is where quality becomes visible. Take time at each step rather than rushing to completion.
After fixtures are installed, test every supply valve, drain, and flush before sealing anything. Check that the exhaust fan is venting to the exterior - not into an attic or wall cavity, which is a common and hazardous installation error. Caulk all transitions between dissimilar materials: where tile meets the tub, where the vanity meets the wall, where the toilet base meets the floor.
A final inspection by the relevant building authority closes out the permit and confirms the work meets code. Keep all permit documentation with your home records - it demonstrates that the work was done correctly and to standard, which matters when you eventually sell or refinance.
Once the permit is closed and the room is clean, take a few days before declaring the project complete. Use the shower, run the sink, and look for any slow drips, tile lippage, or grout cracks that appear after normal thermal expansion. Small issues addressed in the first week cost far less than those discovered months later.
The content on this site is provided for informational purposes only and should not be considered a substitute for professional advice. While we strive to provide accurate and up-to-date information, we make no guarantees regarding its completeness or accuracy. Always consult a qualified professional for advice specific to your circumstances before making any decisions